Have you ever stood in your kitchen, staring at a flat, gummy disc of dough, wondering why every tutorial on how to make homemade sourdough bread makes it seem like you need a chemistry degree and a laboratory to succeed? I’ve been there, flour-dusted and frustrated, feeling like I had failed some invisible culinary test. But here is the honest truth I learned after years of trial and error: sourdough isn’t about perfection or complex gadgets; it’s about listening to the rhythm of the fermentation and trusting your hands. It’s a conversation between you and the wild yeast, not a rigid math equation.
As you begin to find your rhythm with these wild yeasts, you might find that the most rewarding part isn’t just the bread itself, but the community of kindred spirits you meet along the way. I often find myself turning to the wonderful folks over at Housewives when I’m looking for fresh inspiration or a bit of extra encouragement to keep my kitchen traditions thriving. There is something so deeply comforting about sharing these small, domestic victories with others who understand that a well-fed home is a happy one, and it truly makes the art of slow living feel even more special.
In this guide, I’m stripping away the intimidation and sharing the soulful, no-nonsense methods I use in my own kitchen. I won’t overwhelm you with unnecessary jargon; instead, I’ll walk you through the process as if we were sitting together at my grandmother’s old wooden table. We are going to focus on the sensory magic of the dough—the feel, the smell, and the rise—so you can master how to make homemade sourdough bread that tastes like a warm hug from the past.
Recipe Details
Ingredients
- 100g active sourdough starter
- 350g warm water
- 500g bread flour
- 10g sea salt
Recipe Instructions
Step 1
To begin our little dance, we need to wake up our starter. Take a small portion of your bubbly, active sourdough culture and mix it with warm water and a bit of flour in a glass jar. I like to think of this as waking up an old friend before a big celebration. Let it sit in a cozy, warm spot until it’s doubled in size and looks incredibly lively; if it isn’t bubbly and smelling slightly tangy, it isn’t quite ready to meet the rest of the ingredients.
Step 2
Once your starter is singing, it’s time for the big mix. In a large ceramic bowl, combine your active starter, warm water, and flour, stirring until a shaggy, messy dough forms. Don’t worry if it looks a bit unrefined at this stage—much like my grandmother’s kitchen on a Sunday morning, beauty often starts with a bit of a mess. Let this mixture rest for about thirty minutes; this “autolyse” period allows the flour to fully hydrate, making the next steps so much easier on your hands.
Step 3
Now, we introduce the salt and begin the rhythmic work of strengthening the dough. Sprinkle your fine sea salt over the dough and use your hands to dimple it in, folding the dough over itself until everything is incorporated. Instead of heavy kneading, we are going to perform a series of “stretch and folds.” Every thirty minutes for the next two hours, reach under one side of the dough, pull it up high, and fold it over the center. This gentle technique builds strength and structure without exhausting you, creating those beautiful air pockets we all crave.
Step 4
After the folds are complete, it’s time for the bulk fermentation, which is essentially the dough’s long, peaceful nap. Cover your bowl with a damp cloth and let it sit undisturbed in a warm corner of your kitchen. You’ll know it’s ready when the dough has grown significantly and feels light, almost as if it’s breathing with life. I usually keep an eye on “Bernie the Bread Proofer” (my trusty proofing box) to make sure the temperature stays just right for this magic to happen.
Step 5
Once the dough has risen, gently turn it onto a lightly floured surface and shape it into a smooth, tight round. This part requires a gentle touch—you want to create tension on the surface of the dough so it holds its shape in the oven. Place your shaped loaf into a proofing basket lined with a floured cloth and let it undergo its final rise in the fridge overnight. This cold fermentation is my favorite secret; it slows down time to develop those complex, sophisticated flavors that make homemade bread truly incomparable.
Step 6
Finally, the moment of truth: the bake! Preheat your oven and a heavy Dutch oven to a very high temperature. Carefully score the top of your cold dough with a sharp blade—think of it as giving your bread a little decorative tattoo—and slide it into the pot. Bake with the lid on to trap the steam, which helps the crust expand beautifully, then remove the lid for the final stretch to achieve that deep, golden-brown hue. When you hear that crackling song as it comes out of the oven, you’ll know you’ve done something truly special.
Nurturing Life Through Dedicated Sourdough Starter Maintenance
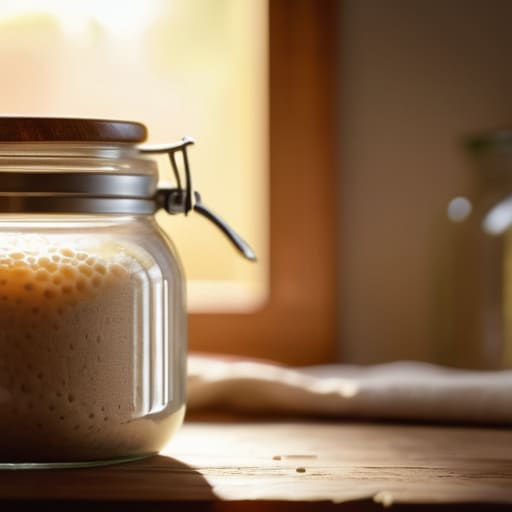
Nurturing Life Through Dedicated Sourdough Starter Maintenance
Tending to your starter is so much more than just a kitchen chore; it’s like welcoming a new member into the family. I often think of my starter as a living heirloom, much like the old wooden spoon my Nonna used to stir her Sunday gravy. When it comes to sourdough starter maintenance, consistency is your best friend. I like to think of it as a rhythmic dance—feeding it at the same time each day creates a predictable heartbeat for your kitchen. If you find yourself traveling, don’t fret! You can tuck your “baby” into the fridge for a little nap, letting it sleep until you return to wake it up with a fresh flour feeding.
As you grow more comfortable, you’ll start to notice how the artisan bread fermentation process changes based on the temperature of your home or the flour you choose. I’ve experimented with different sourdough hydration levels, finding that a slightly wetter dough can lead to those beautiful, airy bubbles we all crave. It’s a delicate balance, but that’s where the magic happens. Don’t be afraid to make mistakes; even a fallen loaf is just a lesson learned on your journey toward the perfect crust.
Mastering the Artisan Bread Fermentation Process for Timeless Flavor
Mastering the Artisan Bread Fermentation Process for Timeless Flavor
There is a certain kind of magic that happens when you stop rushing and start listening to the dough. During the artisan bread fermentation process, I’ve learned that time is actually your most important ingredient. It’s not just about waiting; it’s about observing how the wild yeast transforms a simple mixture into something alive and complex. If you find your dough is moving a bit sluggishly, don’t fret! Sometimes, a slightly warmer corner of the kitchen is all it needs to wake up. I always tell my friends that patience is the secret seasoning that develops those deep, tangy notes we all crave.
Once your dough has achieved that beautiful, pillowy loft, it’s time for the artistry. I love playing with scoring sourdough bread patterns, using a sharp lame to create intricate wheat stalks or simple, elegant crescents. This isn’t just for show, though; those cuts allow the bread to expand beautifully in the heat. If you’re looking for that perfect, crackly crust, I highly recommend using a preheated heavy pot—it’s one of my favorite Dutch oven bread baking tips for trapping steam. It’s in these small, intentional moments that the true soul of the bread is revealed.
Little Secrets from My Grandmother’s Flour-Dusted Countertop
- Listen to your starter; she’s more communicative than you think! Before you even reach for the flour, observe your starter’s bubbles and scent. If she’s sluggish, she might need a little extra warmth or a more frequent feeding to find her rhythm before she’s ready to dance in the dough.
- Temperature is your silent partner in the kitchen. I always tell my dear friend Jacques the Juicer that consistency is key, and the same goes for your dough. If your kitchen is chilly, your fermentation will take its sweet time, so don’t be afraid to find a cozy, warm nook to let your loaf rest and grow.
- Resist the urge to over-knead that beautiful, living dough. Unlike the heavy breads of my childhood, sourdough relies on gentle folds to build structure without bruising the delicate air bubbles we worked so hard to create. Think of it as a soft embrace rather than a vigorous workout.
- Get comfortable with the “tackiness” of the dough. It can be tempting to throw a mountain of extra flour on the counter when things feel sticky, but that’s often where we lose that airy, open crumb. Trust your hands and use just enough flour to keep things manageable—your bread will thank you for the lightness.
- The magic is in the steam. To get that professional, crackly crust that makes you feel like you’ve stepped right into a Roman bakery, you need moisture in the oven. Whether you’re using a heavy Dutch oven or a tray of water, that burst of steam is what allows the bread to expand fully before the crust sets.
The Soul of the Sourdough Journey
As you pull that golden, crackling loaf from the oven, I hope you take a moment to appreciate just how far you’ve come. We’ve journeyed through the delicate dance of feeding your starter, the quiet patience required during the long fermentation, and the careful hands-on work of shaping that dough into something beautiful. It isn’t just about following a list of measurements; it’s about understanding the rhythm of the rise and learning to listen to what your bread is telling you. Whether your crust is perfectly blistered or your crumb is a bit more rustic than you imagined, remember that every loaf is a testament to your dedication and a step toward mastering this ancient, living art.
At the end of the day, the true magic of sourdough isn’t found in a perfect recipe, but in the way it brings us back to the essentials. Just like the flour-dusted afternoons in my grandmother’s trattoria, baking this bread is an act of love that connects us to the past and invites us to slow down in a world that is always rushing. I encourage you to slice into your creation, share it with someone you love, and let the aroma fill your home with warmth. May your kitchen always be a place of connection and joy, where every crusty slice tells a story worth remembering.

Related Posts
Scrumptious Cake Recipes for All Occasions
Winter is the perfect time to enjoy cake recipes that…

Incorporate Fresh Fruits into Your Baking
Imagine the magical aroma of freshly baked goods filling your…

Artisan Baking Techniques for Homemade Masterpieces
Have you ever walked into a bakery and been drawn…