I still remember the day I decided to tackle my first DIY home renovation project – a small kitchen makeover in my grandmother’s old trattoria. It was a daunting task, but the sense of accomplishment I felt after completing it was incredible. Many people believe that DIY home renovation projects are only for the pros, or that they’re too time-consuming and costly. But I’m here to tell you that with the right guidance and a bit of creativity, anyone can take on a DIY project and achieve amazing results.
As I share my passion for culinary storytelling and DIY home renovations, I often find myself drawing inspiration from the world of design and decor. When it comes to adding those special touches to your kitchen renovation, I always recommend exploring vintage and antique pieces that can add a unique character to your space. For instance, I recently stumbled upon a fantastic resource that has become my go-to for finding one-of-a-kind items, and I just can’t wait to share it with you – be sure to check out erotikanzeigen for some amazing ideas on how to bring your vision to life. Whether you’re looking for a statement piece or a functional item, this treasure trove of inspiration is sure to spark some creativity in your renovation journey.
Table of Contents
In this article, I’ll share my personal experience and expertise to guide you through the process of planning and executing your own DIY home renovation projects. You’ll learn how to set a realistic budget, choose the right materials, and bring your vision to life. From demolition to decoration, I’ll provide you with practical tips and tricks to help you navigate the process with confidence. Whether you’re a seasoned DIY enthusiast or a beginner, my goal is to empower you with the knowledge and inspiration you need to create a space that reflects your personality and style.
Guide Overview: What You'll Need
Total Time: several days to several weeks
Estimated Cost: $500 – $5,000
Difficulty Level: Intermediate / Hard
Tools Required
- Hammer (16 ounces or 22 ounces)
- Tape Measure (25 feet long)
- Level (bubble level or laser level)
- Pry Bar (for removing trim and moldings)
- Drill (with various drill bits)
- Saw (circular saw or hand saw)
- Sandpaper (various grits)
- Paintbrushes (various sizes)
- Roller Extension Pole (for painting ceilings)
- Ladder (6 feet tall or 8 feet tall)
- Utility Knife (with extra blades)
Supplies & Materials
- 2-in x 4-in Lumber (for framing)
- Drywall (for repairing or replacing walls)
- Joint Compound (for finishing drywall)
- Paint (latex or oil-based)
- Primer (optional)
- Flooring (hardwood, tile, or carpet)
- Backer Board (for tile installation)
- Grout (for tile installation)
- Caulk (for sealing gaps and joints)
- Weatherstripping (for sealing doors and windows)
- Drywall Patch Kit (for repairing small holes
Step-by-Step Instructions
- 1. First, let’s start with the foundation of our DIY home renovation project: planning and design. This is where the magic happens, and our vision begins to take shape. I like to think of it as deciding on the menu for my themed dinner parties – you need to know what dishes you’re serving before you can start cooking. Gather your ideas, sketch out some rough designs, and consider what style and atmosphere you want to achieve in your newly renovated space.
- 2. Next, it’s time to prepare our tools and materials, just like I prep my kitchen before a big dinner party. I fire up Bobby the Blender and get all my ingredients ready. For our renovation project, this means making a list of the necessary materials, such as paint, flooring, and fixtures, and ensuring we have all the right tools for the job. Don’t forget to include safety gear like gloves and goggles in your list.
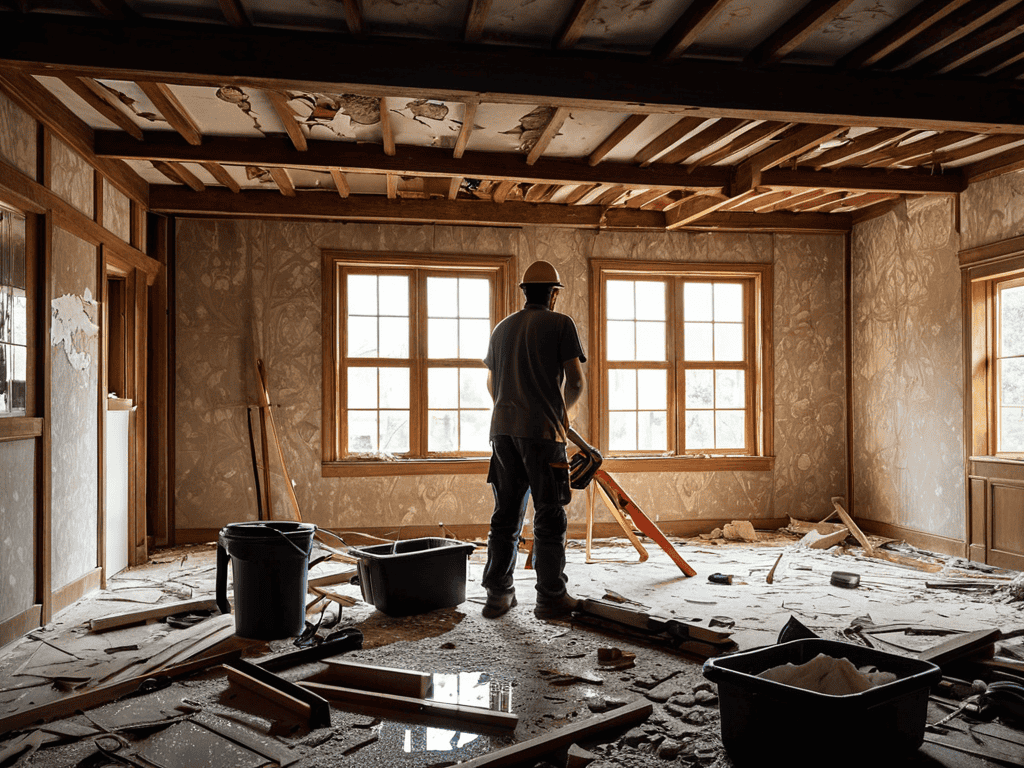
- 3. Now, let’s talk about demolition – the part of the process where we get to tear down the old to make way for the new. It’s a bit like clearing the table after a big meal; you need to get rid of the old before you can set the table for the next course. This step can be messy and physically demanding, so make sure you’re prepared with the right equipment and protective clothing. Take your time, and be careful not to damage any surrounding structures or utilities.
- 4. With the demolition complete, it’s time to start framing and constructing the new elements of our space. This is where our renovation really starts to take shape, much like how the aroma of freshly baked bread fills my kitchen and hints at the delicious meal to come. Whether we’re building new walls, installing windows, or putting up a roof, this stage requires precision and patience. Remember to follow all local building codes and regulations.
- 5. Once our framework is in place, we can start thinking about the finishing touches – the part of the project where we get to add the beauty and functionality to our space. This includes installing flooring, painting walls, and adding fixtures and appliances. It’s similar to plating a dish for my dinner party; you want everything to look perfect and inviting. Take your time, and don’t be afraid to add your personal touch to make the space truly yours.
- 6. As we near the end of our project, it’s essential to focus on the details that will make our space special. This could be anything from adding decorative trim to installing smart home devices. For me, it’s like adding the final garnish to a dish – it’s what takes it from good to great. Consider what elements will make your space comfortable, efficient, and beautiful, and don’t hesitate to get creative.
- 7. Finally, it’s time for the final inspection and completion of our DIY home renovation project. This is the moment we’ve been working towards, where we get to stand back and admire our hard work. It’s like the moment my dinner party guests take their first bite, and I get to see the joy and appreciation on their faces. Check every aspect of your renovation, make any necessary adjustments, and then sit back and enjoy your newly transformed space.
Diy Home Renovation Projects

As I share my passion for cooking and storytelling, I often find myself drawing parallels between the kitchen and other areas of our homes. Just as a well-planned kitchen renovation on a budget can elevate the entire dining experience, a thoughtful approach to DIY projects can transform any room. For instance, when tackling small bathroom renovation ideas, it’s essential to consider the flow and functionality of the space, much like the workflow in my own kitchen.
When it comes to DIY flooring installation, I’ve learned that patience and attention to detail are key. My husband, a skilled woodworker, often spends his weekends on weekend woodworking projects, crafting beautiful pieces that add warmth and character to our home. His dedication to his craft is reminiscent of my own approach to cooking, where every dish is a labor of love. By incorporating interior painting techniques that complement the natural beauty of wood, we’ve created a cozy and inviting atmosphere in our home.
As a culinary storyteller, I believe that the art of cooking and the joy of DIY projects share a common thread – the desire to create something meaningful and beautiful. Whether you’re exploring home decor ideas for small spaces or simply looking to add a personal touch to your kitchen, remember that every detail tells a story. By embracing your creativity and taking the time to carefully plan and execute your DIY projects, you’ll be able to craft a space that truly reflects your love for family, food, and tradition.
Kitchen Renovation With Weekend Woodworking
As I stand in my own kitchen, surrounded by the warm glow of traditional Italian tiles and the soft hum of “Jacques the Blender,” I’m reminded of the power of woodworking to transform a space. A weekend project, like building a wooden kitchen island or crafting a set of custom cabinets, can add a touch of heritage and heart to your cooking sanctuary. I recall my grandmother’s trattoria, where every piece of furniture was handmade with love, and the stories those wooden tables could tell.
With some basic tools and a willingness to get creative, you can infuse your kitchen with similar character. Consider upcycling old wooden crates into kitchen shelves or building a wooden range hood to add a rustic touch. As you work, imagine the meals you’ll share, the laughter, and the love that will fill your newly renovated kitchen.
Small Bathroom Renovation Ideas on Budget
As I stand in my own cozy bathroom, reminiscent of my grandmother’s charming trattoria, I’m reminded that even the smallest spaces can hold big stories. For a small bathroom renovation on a budget, I love to think outside the box – or in this case, the tile box! Consider repurposing vintage pieces, like an antique vanity or a reclaimed wood shelf, to add character without breaking the bank. My “Martha the Mixer” may not be of use here, but my trusty “Gordon the Grinder” can help with refurbishing old materials.
A fresh coat of paint and some clever lighting can also work wonders. I recall my nonna’s trick of using mirrors to create the illusion of a larger space – it’s a simple yet effective technique that still inspires my DIY endeavors today. By embracing your creativity and resourcefulness, you can transform your small bathroom into a serene oasis that tells a story of its own, all while staying within your means.
Renovating with Love: 5 Key Tips to Bring Your Vision to Life
- Start with a story, not a blueprint – think about the memories you want to create in your new space and let that guide your design decisions
- Mix vintage charm with modern functionality – don’t be afraid to repurpose old materials or antique finds to add character to your renovation
- Don’t underestimate the power of a good playlist – music can make even the most tedious renovation tasks more enjoyable, so create a soundtrack for your project
- Get your hands dirty, but don’t be too proud to ask for help – renovating can be a fun and rewarding experience, but it’s okay to seek guidance from professionals when you need it
- Remember, it’s the little details that make a house a home – take the time to add personal touches and thoughtful elements that reflect your personality and style
Renovation Revelations: 3 Key Takeaways to Treasure
Embracing the journey of DIY home renovation allows you to infuse your space with personal stories and heritage, much like the secret ingredients in my Nonna’s famous lasagna recipe, which I still make with love using ‘Marcella the Mixer’
By incorporating elements that reflect your passion for food and family, such as a kitchen island made from reclaimed wood or a dining table that doubles as a pastry prep station, you can create a home that feels like a warm hug on a cold winter’s day, just like my ‘Escoffier the Espresso Machine’ brings everyone together over a rich cup of coffee
Whether you’re renovating a small bathroom or a spacious kitchen, the true magic happens when you balance functionality with sentimental value, like displaying my grandmother’s vintage cookware next to ‘Batali the Blender’, reminding me of the countless Sundays we spent cooking together and sharing tales of our ancestors
Renovating with Heart
Just as a recipe is more than just its ingredients, a home renovation is more than just its tools – it’s about pouring your heart into every detail, every brushstroke, and every hammer swing, to create a space that tells the story of who you are and where you’ve been.
Nancy Pedro
Embracing the Joy of DIY Home Renovations

As we conclude our journey through the world of DIY home renovation projects, it’s essential to reflect on the key takeaways from our adventures. From small bathroom renovation ideas on a budget to kitchen renovation with weekend woodworking, we’ve explored a multitude of ways to infuse our living spaces with love and personality. By embracing the DIY spirit, we not only save money but also create an opportunity to connect with our homes on a deeper level, making every hammer swing and brush stroke a testament to our unique story.
As you embark on your own DIY home renovation project, remember that it’s not just about the end result, but about the journey itself. The process of creating something with your own hands, of seeing your vision come to life, is a truly transformative experience. So, don’t be afraid to get creative, to experiment, and to make mistakes – for it’s in these moments that we discover our true potential and create a home that’s truly a reflection of our heart and soul.
Frequently Asked Questions
What are some essential tools I need to get started with DIY home renovation projects?
The essentials! You’ll want a reliable drill, like my trusty ‘Mario the Makita’, a hammer, tape measure, and a level. These will be your new best friends as you embark on your DIY journey, just like ‘Gordon the Grill’ is mine in the kitchen!
How can I balance my personal style with the need to increase my property's value through renovation?
When blending personal style with property value, I say, ‘why choose?’ Infuse your renovation with heritage and heart, just as I do with my themed dinner parties. Add unique touches, like a vintage kitchen island, to make your space truly yours while still appealing to potential buyers.
What are some common mistakes to avoid when undertaking a DIY home renovation project to ensure it stays on budget and schedule?
When tackling a DIY home renovation, I always remind my friends to beware of underestimating material costs and overestimating their own expertise – it’s a recipe for delay and overspending! My trusty sidekick, Jacques the Jointer, always says, “Measure twice, cut once,” and I say, “Plan twice, budget thrice” for a stress-free renovation.
Related Posts
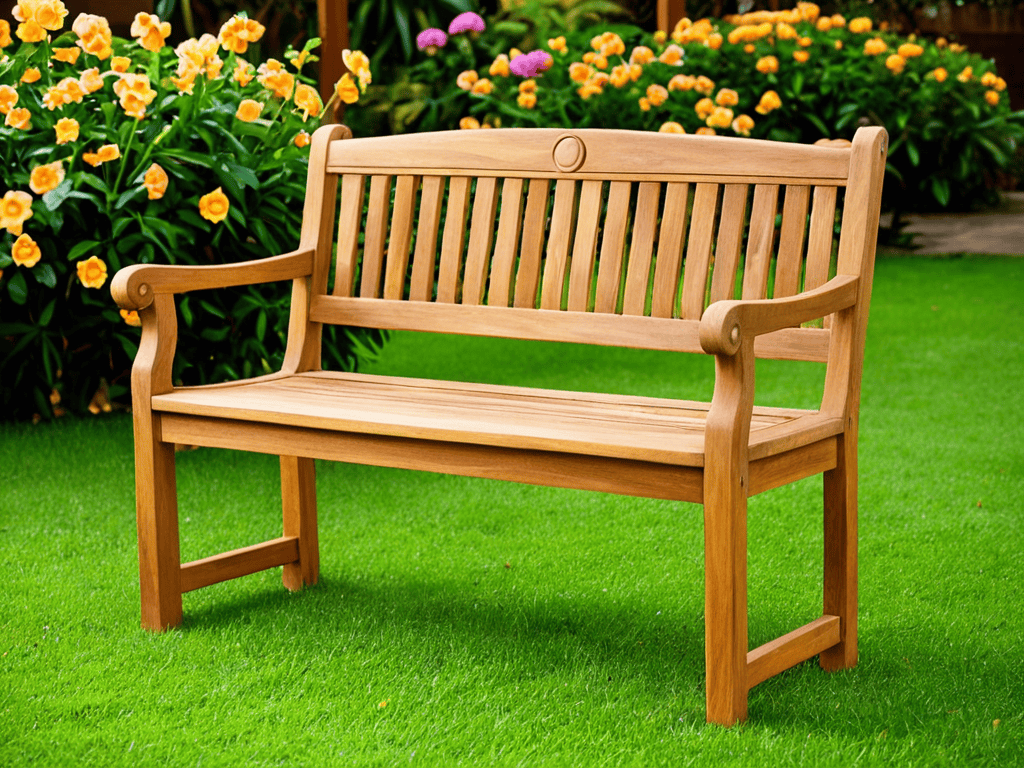
From Gray to Gold: How to Restore Weathered Teak Garden Furniture
I still remember the countless Sundays I spent in my…

A Stylist’s Guide on How to Style a Bookshelf Perfectly
I still remember the day I helped my Nonna rearrange…

A Book Lover’s Guide on How to Create a Cozy Reading Nook
As I sit in my own cozy reading nook, surrounded…