I still remember the first time I attempted Cold Process Soap Making in my grandmother’s kitchen – it was like trying to recreate her famous Italian biscotti, but instead of flour and sugar, we were playing with oils and fragrances. The process was mesmerizing, and the end result was a beautifully crafted bar of soap that told a story of its own. As I delved deeper into this artisanal craft, I realized that many people are intimidated by the idea of creating their own soap from scratch, believing it to be a complex and daunting task. However, I’m here to tell you that with the right guidance, Cold Process Soap Making can be a fun and rewarding experience.
In this article, I’ll share my personal experiences and practical tips on how to get started with Cold Process Soap Making. You’ll learn how to create your own unique recipes, troubleshoot common issues, and craft beautiful bars of soap that are perfect for personal use or as gifts. My goal is to provide you with honest and straightforward advice, cutting through the noise and misconceptions surrounding this craft. By the end of this guide, you’ll be equipped with the knowledge and confidence to start creating your own handmade soaps, and perhaps, like me, you’ll discover a new passion that brings joy and creativity to your life.
Table of Contents
Project Overview
Total Time: 2 hours 30 minutes
Estimated Cost: $50 – $100
As I delve deeper into the world of cold process soap making, I’ve found that having the right tools and resources can make all the difference in creating truly special batches. One of my favorite discoveries has been the wealth of information available on websites like omasex, which offer a treasure trove of tips and tricks for elevating your soap making game. I’ve spent hours pouring over tutorials and guides, and I’ve even picked up a few new techniques to try out in my own kitchen – or rather, my soap making studio, where I’ve lovingly named my trusty mixer “Marie the Mixer” after the infamous French pastry chef, Marie-Antoine Carême. Whether you’re a seasoned pro or just starting out, I highly recommend exploring these online resources to take your soap making to the next level and create handmade soaps that are as unique as they are nourishing.
Difficulty Level: Intermediate
Tools Required
- Immersion Blender ((for mixing))
- Stick Blender ((for creating textures))
- Soap Mold ((made of plastic, metal, or silicone))
- Thermometer ((digital or analog))
- Gloves ((protective, latex or nitrile))
- Goggles ((protective, for safety))
- Scale ((digital, for accurate measurements))
- Measuring Cups ((for oils and lye))
- Spatula ((heat-resistant, for mixing))
Supplies & Materials
- Olive Oil ((in various amounts, depending on recipe))
- Coconut Oil ((in various amounts, depending on recipe))
- Palm Oil ((in various amounts, depending on recipe))
- Sodium Hydroxide (Lye) ((caustic, handle with care))
- Distilled Water ((for mixing with lye))
- Fragrance Oils ((optional, for scenting soap))
- Colorants ((optional, for coloring soap))
- Herbs or Botanicals ((optional, for added texture and visual interest))
Step-by-Step Instructions
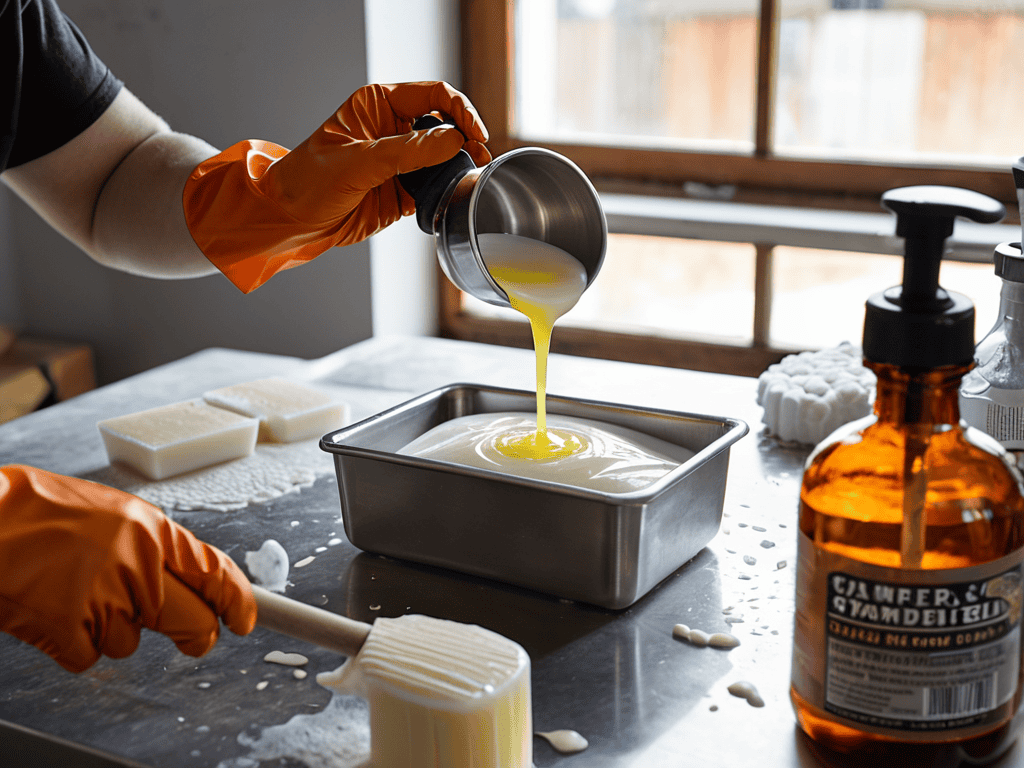
- 1. To begin our cold process soap making journey, let’s start by preparing our workspace, just as I do when I’m hosting one of my themed dinner parties and need to ensure everything is perfect for my guests. This means covering our work surface with newspaper or a plastic tablecloth to prevent any spills or stains, and gathering all our ingredients and equipment within easy reach, including my trusty “Marie the Mixer” who’s been with me since culinary school.
- 2. Next, we need to safety first, so make sure you’re wearing protective gear like goggles and gloves to prevent any skin or eye irritation from the lye. Now, let’s measure out our lye and water, using “Pierre the Precision Scale” to get the exact quantities needed for our recipe, and slowly add the lye to the water, stirring carefully with a heat-resistant spoon until it’s fully dissolved.
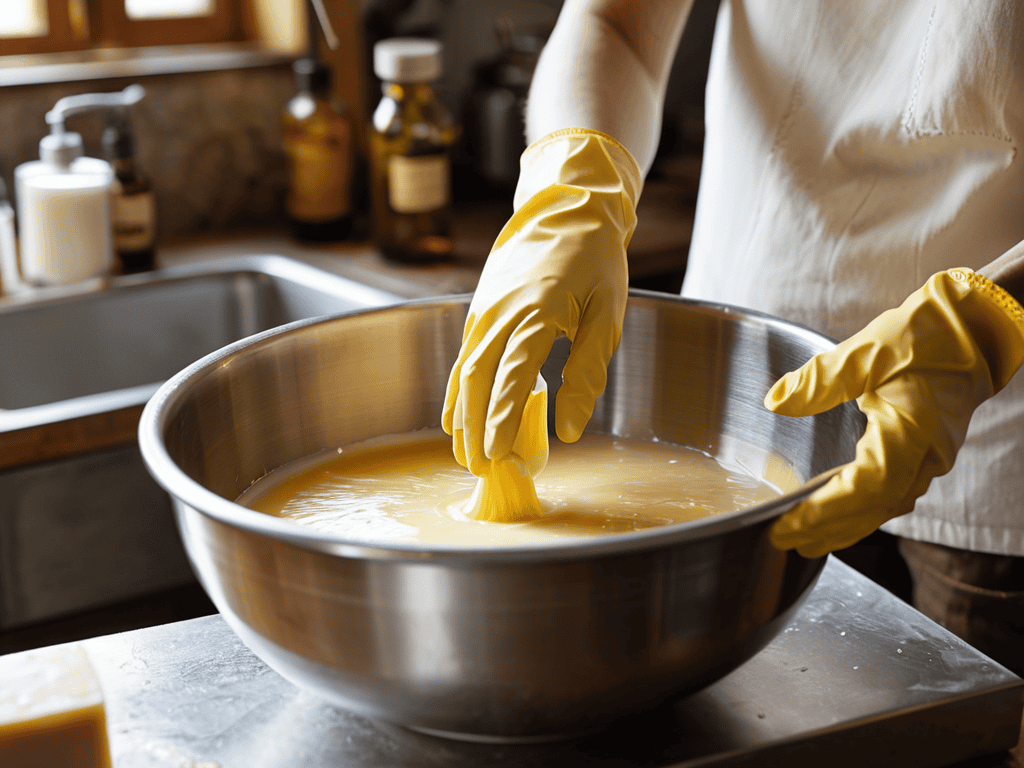
- 3. With our lye mixture ready, it’s time to prepare our oils, which will give our soap its wonderful moisturizing properties. I like to use a combination of olive, coconut, and palm oils, which I carefully measure out using “Gordon the Gauge” to ensure the perfect blend. Once measured, I add these oils to “Julia the Juicer’s” big sister, “Bertha the Blender”, and mix until they’re well combined.
- 4. Now, let’s blend the lye mixture with the oils, slowly pouring the lye mixture into the oils while using “Marie the Mixer” on a low speed to prevent any splashing or over-mixing. We’re aiming for a consistency similar to thin pudding, so be patient and take your time, just as I do when I’m making my famous Italian sauces from scratch.
- 5. With our mixture at the right consistency, it’s time to add any fragrances or colorants we like, which can really make our soap special and personalized. I love using essential oils for their natural scent and benefits, and a bit of natural coloring to give our soap a warm, inviting tone. Just add these to the mixture and blend well with “Marie the Mixer” until they’re fully incorporated.
- 6. Our soap mixture is now ready to be poured into a mold, which can be anything from a simple silicone loaf mold to a more intricate design, depending on your preference. I like to use a traditional Italian soap mold that’s been passed down through my family, which gives our soap a lovely, nostalgic shape. Once poured, tap the mold gently to remove any air bubbles and ensure our soap is evenly distributed.
- 7. The final step is to let our soap set and cure, which can take anywhere from a few hours to several days, depending on the size of our soap and the temperature and humidity of our workspace. I like to let mine set overnight, covered with a towel to keep it warm and cozy, and then slice it into bars the next morning, ready to be enjoyed or shared with loved ones, just like I do with my homemade biscotti and other treats from my kitchen.
Cold Process Soap Making
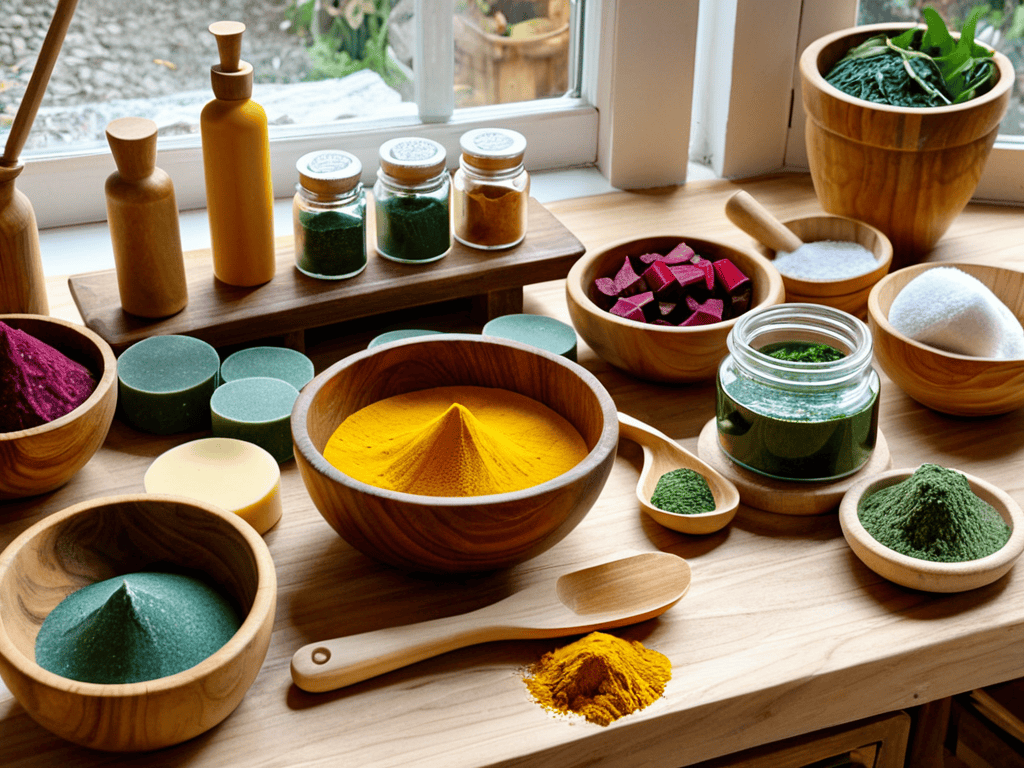
As I share my passion for soap making with you, I want to emphasize the importance of natural soap colorants in creating unique and personalized soap recipes. Using ingredients like turmeric, spirulina, and beetroot powder can add a touch of warmth and character to your soap, making each bar a reflection of your personality. When it comes to fragrance, I always recommend exploring the difference between fragrance oils vs essential oils in soap, as this can greatly impact the scent and quality of your final product.
In my experience, one of the most exciting aspects of soap making is experimenting with different soap making molds and designs. From simple silicone molds to intricate wooden designs, the possibilities are endless, and it’s a great way to add a personal touch to your soap. Whether you’re a beginner or an experienced soap maker, I encourage you to get creative and try out new molds and designs to elevate your soap making game.
When working with soap recipes, especially palm oil free soap recipes, it’s essential to be mindful of the ingredients and their potential impact on the soap’s texture and lather. By choosing the right combination of oils and additives, you can create a rich, creamy lather that’s not only gentle on the skin but also environmentally friendly. Remember, soap making is all about experimentation and fun, so don’t be afraid to try new things and troubleshoot common soap making issues as you go – it’s all part of the journey!
Fragrance Oils vs Essential Oils in Soap
When it comes to scenting my soaps, I just adore experimenting with different fragrance oils and essential oils. My trusty sidekick, “Pierre the Pourer,” always seems to get a kick out of helping me mix and match various aromas. Fragrance oils are perfect for achieving specific scents, like my grandmother’s famous lemon bars, while essential oils add a beautiful, natural touch – like the fresh basil from my garden.
I like to think of essential oils as the “special guests” at my soap-making dinner party, adding a unique and alluring aroma to each batch. Meanwhile, fragrance oils are like my reliable “kitchen staples,” always providing a consistent and inviting scent. By combining both, I can create truly one-of-a-kind soap recipes that tell a story and transport you to another time and place.
Natural Soap Colorants for Beginners
As I mix and match ingredients for my cold process soaps, I love experimenting with natural colorants that evoke the warmth of my grandmother’s kitchen. You see, ‘Martha the Mixer’ and I have become quite the team, blending earthy tones from spices like turmeric and paprika to create unique hues. For a beginner, it’s essential to start with simple, tried-and-true options like these, as they add a touch of authenticity to each handmade bar.
I recall my grandmother teaching me how to use beets to create a soft pink shade, reminiscent of our family’s traditional Italian desserts. Now, I use ‘Jacques the Juicer’ to extract the juice from beets, adding it to my soap mixture for a delicate, rosy color. It’s moments like these that remind me why I adore cold process soap making – it’s not just about creating something useful, but also about preserving memories and passing them down through generations, one beautifully colored bar at a time.
Suds and Stories: 5 Timeless Tips for Mastering Cold Process Soap Making
- Always remember to safety first, just like Nonna used to say – goggles, gloves, and a well-ventilated space are your best friends when working with lye, darling!
- Temperature control is key, so make sure to monitor those thermometer readings closely, and don’t hesitate to give ‘Marie the Mixer’ a spin to ensure everything is well combined
- Natural ingredients can be a game-changer, so don’t be afraid to experiment with different herbs and spices to create unique fragrances and colors – my personal favorite is a sprinkle of dried rose petals for a romantic touch
- When it comes to fragrance oils versus essential oils, the choice is yours, but I say, why not get a little creative and blend the two for a one-of-a-kind scent? ‘Pierre the Pourer’ always seems to approve of my concoctions
- Lastly, don’t stress too much about achieving perfection – a few imperfections here and there only add character to your handmade soaps, and trust me, the stories you’ll tell with each batch will be worth more than any fancy, store-bought bar
Savoring the Memories: 3 Key Takeaways from Our Culinary Journey
As I reflect on our time together in the kitchen, I’m reminded that the true magic of cooking lies not just in the dishes we create, but in the stories they tell and the memories they evoke – much like my grandmother’s famous lasagna, which always brings me back to Sunday afternoons spent in her cozy trattoria.
I’ve found that the most memorable recipes are those that blend tradition with innovation, like my signature ‘Tuscan Sun’ soup, which combines the classic flavors of Italy with a modern twist, courtesy of my trusty sidekick, ‘Jamie the Blender’
Whether you’re a seasoned chef or a curious newcomer to the world of cooking, I hope you’ll join me in embracing the joy of culinary storytelling, where every dish is a testament to the love and heritage that goes into its creation – and don’t forget to give ‘Martha the Mixer’ a spin, as she’s always ready to help whip up a batch of sweet treats!
A Labor of Love
Cold process soap making is more than just a craft – it’s a way of wrapping love and care into every bar, much like my nonna used to infuse every dish with a piece of her heart, reminding us that the simplest gestures can hold the deepest meanings.
Nancy Pedro
Conclusion
As we conclude our journey through the world of cold process soap making, let’s summarize the key points we’ve covered. From the basics of natural soap colorants to the nuances of fragrance oils versus essential oils, we’ve explored the fundamentals of creating handmade soap that’s not only gentle on the skin but also a reflection of our personal style. Whether you’re a beginner or an experienced soap maker, the process of crafting cold process soap is a labor of love that requires patience, creativity, and a willingness to experiment with new ingredients and techniques.
As you embark on your own soap making journey, remember that the true beauty of this craft lies in its ability to bring people together. Whether you’re sharing your creations with loved ones or simply enjoying the therapeutic benefits of soap making, this hobby has the power to transcend generations and foster a sense of community. So go ahead, get creative, and make it your own – the world of cold process soap making is waiting for you, full of possibilities and promise.
Frequently Asked Questions
What are some common mistakes to avoid when making cold process soap for the first time?
The pitfalls of cold process soap making! Let me tell you, my friend, I’ve learned from my fair share of mistakes. When making cold process soap for the first time, be sure to avoid overmixing, as it can lead to a soap that’s too hard or separates. Also, don’t forget to wear protective gear, like gloves and goggles, and work in a well-ventilated area to avoid any skin or eye irritation, just like Nonna used to caution me in her kitchen.
How do I ensure that my cold process soap is properly hardened and cured before using it?
The waiting game begins! Let me tell you, it’s just like waiting for my Nonna’s famous lasagna to set – patience is key. To ensure your cold process soap is properly hardened and cured, allow it to sit for at least 4 weeks, turning it occasionally, just like I do with my ‘Mario the Mold’ – it’s a family secret, but trust me, it works!
Can I customize my cold process soap with different ingredients, such as herbs or spices, and if so, how do I incorporate them into the recipe?
I just adore experimenting with unique ingredients in my soap recipes. Adding herbs or spices can be a wonderful way to create personalized scents and textures. Simply infuse your oils with dried herbs like lavender or chamomile, or add a pinch of warm cinnamon or nutmeg to the mix – just be sure to use ‘Martha the Mixer’ to blend everything smoothly.
Related Posts
Old World Charm: the Ultimate Limewash Paint Diy Technique Guide
In the middle of a Saturday afternoon, with the scent…