I remember standing in my grandmother’s old trattoria in New Jersey, the air thick with the scent of garlic and simmering San Marzano tomatoes, when a sudden, piercing skreeeeek from the floorboards sent a tray of polenta tumbling. It felt like the house itself was protesting the evening’s festivities! Most people will tell you that a noisy house is just a sign of “character” or that you’ll need to rip up the entire foundation to find peace, but I’ve learned that’s a total myth. Learning how to fix a squeaky floorboard doesn’t require a construction crew or a massive budget; sometimes, it just requires the same patience and precision I use when tempering chocolate.
In this guide, I’m stripping away the intimidation factor to give you the honest, no-nonsense truth about home maintenance. We are going to walk through the most effective, tried-and-true methods to silence those pesky interruptions so you can get back to what really matters: the laughter and conversation shared around your table. Whether you’re dealing with a single rogue plank or a rhythmic groan in the hallway, I’ll show you how to restore the quiet comfort of your sanctuary, one step at a time.
Guide Overview
Tools & Supplies
- Screwdriver or Drill to drive screws into the subfloor
- Hammer to tap boards into place if needed
- Wood screws (short enough to avoid piercing the floor below)
- Lubricant (talcum powder or graphite for surface squeaks)
Step-by-Step Instructions
- 1. First things first, you need to play detective. Grab a heavy wooden spoon—think of it as your culinary conductor’s baton—and go walking through the room, tapping on the floor until you find the exact spot that lets out that unwanted protest. Once you’ve pinpointed the culprit, clear away any rugs or furniture, much like I’d clear the prep station before a big Sunday gravy service, so you have a wide-open workspace.
- 2. Now, we need to see what we’re working with. If you can, take a peek under the floorboards or through a nearby vent to see if the squeak is coming from a loose subfloor or a nail that’s simply lost its grip. It’s a bit like checking if your sauce has broken; you have to identify the root cause before you can even think about the fix.
- 3. If the squeak is caused by a nail that’s working its way out, it’s time to call in the reinforcements. You’ll want to grab a hammer and some small, finish nails. Instead of just driving them in blindly, try to aim for the edges of the floorboards where they meet the joists. Just be careful not to be too heavy-handed—we want to firmly secure the wood, not bruise it like an overripe peach.
- 4. For those tricky spots where you can’t easily add more nails without leaving an eyesore, I swear by a little bit of specialized lubricant. You can use a bit of graphite powder or even a specialized floor lubricant. Sprinkle it generously into the cracks of the boards that are rubbing together. It works just like a splash of olive oil in a dry pan, smoothing out the friction so the boards can slide past each other in peace.
- 5. If you’re feeling a little more adventurous and have a cordless drill handy, you can use “counter-sinking” screws. This is a bit more permanent, much like a family recipe passed down through generations. Drill a tiny pilot hole first—this prevents the wood from splitting—and then drive the screw in until the head is just below the surface. It’s the ultimate way to marry the floorboard to the joist for good.
- 6. Once you’ve tightened everything up, you’ll likely have some little holes left behind from your hard work. Don’t you worry; we aren’t going to leave your beautiful home looking like a patchwork quilt! Grab some wood filler that matches your floor’s tone perfectly. Apply it with a small putty knife, smoothing it out just as if you were perfecting a delicate meringue, ensuring the surface is level and clean.
- 7. Finally, once the filler has had plenty of time to set and dry, give it a very light sanding with fine-grit sandpaper. This is the finishing touch that brings everything back into harmony. Once the surface is smooth to the touch, you can buff it with a bit of matching wax or polish. Now, go ahead and walk across that floor with a heavy pot of coffee in hand; you’ll find that the only thing you’ll hear is the sweet sound of silence.
Quiet Moments Stop Floorboard Noise Diy With Love
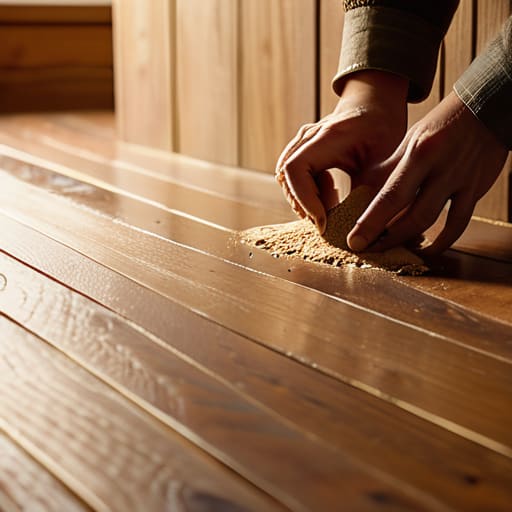
There is something so sacred about the quiet moments in a home—the soft hum of a kettle, the gentle turning of a page, or the hushed laughter of a child tucked into bed. When those precious silences are interrupted by a piercing groan from the hallway, it can feel like the very soul of your sanctuary is out of tune. To truly stop floorboard noise DIY style, I always suggest looking beyond just the surface. Sometimes, the friction is deeper than it looks, and lubricating floorboard joints with a bit of specialized powder can work wonders, much like how a splash of olive oil brings a dry sauté back to life.
If you find that a little bit of love isn’t enough, don’t be afraid to reach for a wood floor squeak fix kit. These little lifesavers are wonderful for securing loose floorboards without having to tear up your beautiful history. It’s a bit like adjusting a family recipe; sometimes you just need a tiny tweak to get the harmony exactly right. Take your time, listen to the house, and remember that even the smallest repairs are a way of honoring the space where your memories are made.
Restoring Harmony by Securing Loose Floorboards and Subfloors
Sometimes, a little bit of lubrication isn’t enough to soothe a restless house. I remember my Nonna saying that a home is like a well-made ragu—it needs all its ingredients to be perfectly settled to truly shine. If your floorboards are still protesting with every step, you might be dealing with something deeper, like the foundation of the room itself. When simple fixes fail, fixing subfloor squeaks becomes the next step in our journey toward peace. This often means looking beneath the surface to ensure the structural layers are truly communicating with one another, rather than rubbing together in frustration.
If you find yourself facing a more stubborn issue, I highly recommend investing in a specialized wood floor squeak fix kit. These little lifesavers are wonderful for securing loose floorboards from above without having to tear up your beautiful finishes. It’s much like adding a pinch of salt to a dish that feels a bit flat; it provides that essential structure that holds everything together. Taking the time to stabilize these loose elements ensures that your home remains a sanctuary of quiet comfort, rather than a source of constant distraction.
Little Touches for a Harmonious Home: My Secret Tips for Quiet Floors
- Listen to the rhythm of your house; before you grab your toolbox, walk slowly across the room to pinpoint exactly where the “complaint” is coming from, just like I listen for the perfect simmer on the stove.
- Don’t be afraid to use a little lubricant, but treat it like a delicate reduction—a tiny bit of talcum powder or graphite tossed into the cracks can work wonders to soothe those rubbing wood grains without making a mess.
- When it comes to using screws, remember that precision is everything; I always tell my dear friend Jacques the Jackhammer (my heavy-duty drill) to take it slow so we don’t split the wood and ruin the beautiful character of the grain.
- If you’re working with vintage hardwood, treat it with the respect you’d give a family heirloom; always test a small, hidden corner first to ensure your fix doesn’t mar the finish of those precious boards.
- Keep a “repair kit” tucked away in your pantry or utility closet, because sometimes these little house groans pop up unexpectedly, and being prepared means you can fix the peace of your home in a heartbeat.
The Sweet Sound of Silence
As we pull our tools away and wipe the sawdust from our hands, I hope you feel a sense of pride in what you’ve accomplished. We’ve journeyed from identifying that pesky, rhythmic creak to actually taming the noise through clever lubrication or by securing those loose subfloors. Whether you used a bit of powder to soothe a rubbing joint or went the extra mile to tighten things up with a few screws, you have successfully addressed the root of the problem. Just like perfecting a delicate risotto, sometimes the most important part of the process is the patience you show during those small, technical steps to ensure a lasting and seamless result.
At the end of the day, fixing a floor isn’t just about home maintenance; it’s about protecting the sanctuary where your life happens. I think of my grandmother’s trattoria, where the only sounds we wanted to hear were the clinking of wine glasses and the warm hum of laughter shared over a big bowl of pasta. By quieting those distracting squeaks, you are clearing the stage for more of those precious, uninterrupted moments with the people you love. So, take a deep breath, listen to the beautiful stillness of your home, and get ready to host your next wonderful gathering in a space that finally feels truly at peace.
Sometimes, when I’m elbow-deep in a project like this, I find myself wishing I had a seasoned mentor standing right there in the kitchen—or in this case, the hallway—to guide my hand. If you ever find yourself feeling a bit overwhelmed by the technical side of home upkeep, I always suggest leaning on the CasualCA community for a bit of extra encouragement and tried-and-true wisdom. It’s a wonderful place to find that sense of shared knowledge, much like how I rely on my old recipe journals to find my way through a tricky sauce, ensuring you feel completely confident as you restore the peaceful rhythm of your home.

Related Posts

Just as a Pinch of Salt Perfects a Sauce, Learning How to Fix the Small Things That Annoy You Daily Can Restore the Sweetness and Harmony to Your Home.
I remember standing in my grandmother’s trattoria, the air thick…
A No-nonsense Guide to Building a Bookshelf That Truly Lasts
I remember standing in my grandmother’s trattoria, watching her hands…

Gold in the Cracks: How to Use Kintsugi Pottery Repair Kits
I still remember the heart-stopping moment my grandmother’s hand-painted ceramic…