I remember standing in my grandmother’s trattoria, watching her meticulously prep a batch of handmade pappardelle; she always said that if you rush the dough, you ruin the soul of the pasta. I learned the hard way that many people think a fresh coat of color is just about slapping some pigment on a wall and calling it a day, but that’s a recipe for disaster. If you want to truly master how to repaint a room properly, you have to treat your walls with the same respect and patience you’d give a delicate reduction sauce. You can’t just skip the prep work and expect a masterpiece; without a solid foundation, even the most expensive paint will end up looking patchy and tired.
In this guide, I’m stripping away the fluff to give you the honest, no-nonsense steps for a professional finish. We’re going to walk through everything from the essential sanding techniques to choosing the right primer, ensuring your space feels like a warm embrace rather than a DIY catastrophe. Whether you’re refreshing a cozy reading nook or tackling a grand dining hall, I’ll show you how to achieve results that look like they were done by a pro, leaving you with a room that’s ready to host a lifetime of memories.
Guide Overview
Tools & Supplies
- Paint roller and tray for large surfaces
- Angled brush for cutting in edges
- Painter's tape for protecting trim
- Sandpaper for smoothing walls
- Interior paint (1-2 gallons per coat)
- Painter's primer (1 gallon)
- Drop cloths (2-3 large sheets)
- Spackle (1 small tub for holes)
Step-by-Step Instructions
- 1. First things first, we have to clear the table, much like how I clear the counters before a big Sunday feast. You’ll want to move your furniture to the center of the room and cover it with sturdy drop cloths. Don’t forget to remove those pesky outlet covers and light switch plates too; it’s those little details that make the finished look feel truly professional and polished.
- 2. Now, we move on to the prep work, which is really the soul of the project. Just like you wouldn’t throw unwashed vegetables into a simmering pot, you can’t just slap paint over dust and grime. Grab a damp cloth and wipe down your walls to remove any cobwebs or oils. If you find any little nicks or dents in the plaster, fill them with a bit of spackle and let it dry completely. Trust me, a smooth foundation is the secret to a flawless finish.
- 3. Once your walls are clean and smooth, it’s time to grab your painter’s tape. This is where you get to be precise, almost like decorating a delicate cannoli. Apply the tape along the baseboards, the ceiling edges, and around the window frames. Make sure you press the edges down firmly with your finger so that no stray color seeps underneath while you’re working your magic.
- 4. Before we pick up the big rollers, we have to “cut in.” This is my favorite part because it requires a bit of a gentle touch. Using a high-quality angled brush, paint a border around the edges of the room, the corners, and around the trim where a roller just can’t reach. Think of it as seasoning the edges of your dish; it ensures every single inch of the room is covered with love and intention.
- 5. Now, it’s time to let “Gordon the Griddle” (my trusty heavy-duty roller) take the lead! Dip your roller into the tray and roll it back and forth until it’s evenly coated, but not dripping. Start with a “W” or “M” pattern on the wall to distribute the paint, then fill in the gaps. This technique helps you avoid those dreaded streak marks and ensures the color looks rich and even, much like a perfectly emulsified vinaigrette.
- 6. Patience is a virtue, especially when you’re waiting for that first layer to set. You absolutely must let the first coat dry completely before even thinking about the second. If you rush this, you’ll end up with a gummy mess that’s more frustrating than a fallen soufflé! Once it’s dry to the touch, go in for that second coat to really bring the depth and true character of your chosen color to life.
- 7. Finally, once everything is dry and looking absolutely beautiful, it’s time for the most rewarding part: the reveal. Carefully peel away your painter’s tape while the paint is still slightly tacky to get those crisp, clean lines. Put your furniture back, replace your outlet covers, and take a deep breath. You haven’t just changed a color; you’ve transformed a space into a beautiful backdrop for your next great memory.
Gathering Your Essential Painting Tools and Supplies
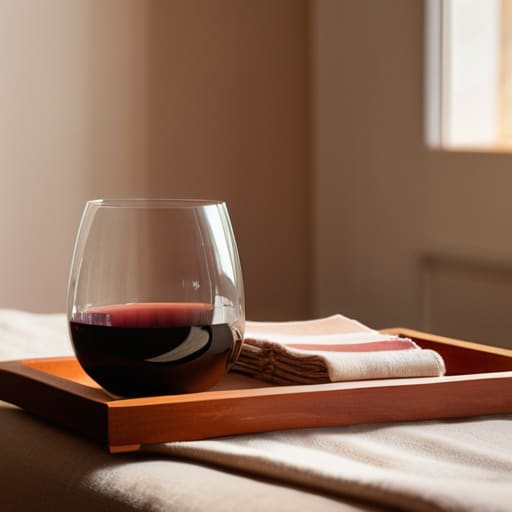
Once you’ve finished scrubbing those walls and making sure everything is as smooth as a fresh batch of homemade ricotta, you might find yourself needing a little extra inspiration to decide on that perfect, soul-warming color palette. I always tell my friends that choosing a shade is a lot like selecting the right wine for a Sunday feast—it sets the entire mood for the evening. If you’re feeling a bit stuck or just need a quiet moment to find your creative spark before diving into the actual painting, I’ve found that spending some time on this chat site can be a wonderful way to clear your head and chat through your ideas. It’s those small moments of connection that truly help us prepare our hearts and minds for the beautiful transformations we’re about to undertake in our homes.
Before we dive into the colors, we have to talk about the mise en place of the home improvement world. Just as I wouldn’t dream of starting a Sunday gravy without my garlic and basil ready on the counter, you shouldn’t pick up a brush without gathering your essential painting tools and supplies first. I always tell my friends that a cluttered workspace leads to a cluttered mind—and a messy floor! Make sure you have high-quality painter’s tape, drop cloths that actually stay put, and a few different brush sizes. I even have a little rolling cart I call “Remy” that holds all my rollers and trays; having everything within arm’s reach makes the whole process feel much more like a rhythmic dance than a chore.
Don’t forget the “prep cooks” of your kit! You’ll need a good spackle and a putty knife for patching holes in drywall before painting, because nothing ruins a smooth finish like a hidden bump under the fresh coat. While you’re gathering your gear, take a moment to think about how to choose the right paint finish for your space. A soft eggshell is lovely for a cozy living room, much like the warm lighting in my grandmother’s trattoria, whereas a semi-gloss is better for those high-traffic areas that need a little extra scrubbing.
Mastering How to Prep Walls for Painting With Love
Now, darling, we come to the most important part—the soul of the project. Just like my Nonna used to say about a slow-simmered marinara, you simply cannot rush the foundation if you want a masterpiece. Learning how to prep walls for painting is much like cleaning out a spice cabinet before a big feast; if you leave the old dust and crumbs behind, nothing tastes quite right. I always grab my sanding sponge and a damp cloth to ensure every inch is smooth. If your walls have seen better days, don’t fret! Take your time patching holes in drywall before painting with a bit of spackle. Treat those little imperfections with the same patience you’d use when kneading dough; once they are sanded smooth, they’ll disappear into your new color like magic.
While you’re working, remember that a little care goes a long way in preventing paint drips and splatters from ruining your hard work. I like to lay down my drop cloths with the same precision I use when setting a festive table. It’s all about creating a sanctuary where you can truly relax and enjoy the transformation.
Little Secrets for a Finish That Feels Like Home
- Don’t skimp on the quality of your brushes; think of them like a high-quality pasta cutter—if the tool is dull or cheap, the texture of your work will suffer, so invest in something that glides like silk.
- Always work in small, manageable sections, much like how my Nonna would teach me to fold dough; if you try to tackle the whole wall at once, you’ll end up with uneven streaks and a whole lot of heartache.
- Let’s talk about lighting! Before you commit to a color, check it under the warm glow of your lamps and the bright morning sun, because a shade that looks like a soft Tuscan sunset at noon might turn quite moody by dinnertime.
- Remember that patience is the most important ingredient in any recipe, including painting; give each coat plenty of time to dry completely before reaching for more, or you’ll end up with a gummy mess instead of a smooth masterpiece.
- Keep a damp cloth handy for those little “oops” moments, just like keeping a towel tucked into your apron when simmering a delicate sauce; it’s much easier to catch a stray drip immediately than to scrub it out once it’s set.
The Final Flourish
Now that we’ve moved through the heavy lifting, take a moment to look back at how far you’ve come. We didn’t just slap some color on a wall; we took the time to gather our tools with intention, prepped every surface until it was as smooth as a fresh batch of homemade gnocchi, and applied that paint with a steady, patient hand. It’s those little details—the sanding, the priming, and the careful taping—that ensure your hard work doesn’t just look good today, but stands the test of time. Remember, a beautiful finish is always built upon a foundation of meticulous preparation and a little bit of patience.
As the scent of fresh paint begins to fade and your new colors settle into the light, I hope you feel a sense of profound pride in what you’ve created. Just like my grandmother used to say in her trattoria, the best things in life are those we nurture with our own hands. Your home is more than just four walls; it is the canvas upon which your family’s most precious memories will be painted. May this newly transformed space become a sanctuary where laughter flows as freely as wine and where every corner feels like a warm embrace from the past. Happy decorating, my dear friends!

Related Posts

Gold in the Cracks: How to Use Kintsugi Pottery Repair Kits
I still remember the heart-stopping moment my grandmother’s hand-painted ceramic…

Locking the Color: Natural Dye Mordant Fixation
I still remember standing in my grandmother’s sun-drenched kitchen in…
A No-nonsense Guide to Repairing Drywall Holes Without the Stress
I was in the middle of hosting my monthly "Flavors…