I remember standing in my grandmother’s trattoria, watching her hands—weathered and wise—knead dough with a rhythmic, unstoppable force that seemed to defy time itself. She used to say that if you rush the proofing, you lose the soul of the bread, and I’ve realized that the same wisdom applies to our homes. Most people think that building furniture is just about following a blueprint and hammering a few nails, but they quickly find that flimsy, store-bought particle board collapses under the weight of a single heavy cookbook. If you want to learn how to build a bookshelf that lasts, you have to stop thinking about it as a weekend project and start treating it like a family heirloom in the making.
In this guide, I’m stripping away the complicated jargon to give you the honest, no-nonsense truth about structural integrity. We aren’t just assembling boards; we are selecting the right “ingredients” to ensure your shelves won’t sag or buckle when you fill them with your most precious treasures. I will walk you through everything from choosing the right wood to the small, crucial joinery details that separate a temporary fix from a masterpiece. Let’s roll up our sleeves and build something that will hold your stories for generations.
Guide Overview
Tools & Supplies
- Circular Saw or Table Saw for straight cuts
- Drill/Driver for assembly and pilot holes
- Pocket Hole Jig for strong, hidden joints
- Orbital Sander for smooth surfaces
- Speed Square to ensure 90-degree angles
- Hardwood boards (Oak, Maple, or Walnut) 1×12 or 2×12
- Wood Glue (high quality, e.g., Titebond II)
- Pocket Hole Screws (appropriate length for thickness)
- Wood Finish (Polyurethane or Hardwax Oil)
- Sandpaper (80, 120, and 220 grit)
Step-by-Step Instructions
- 1. Before we even touch a saw, we need to gather our “ingredients” with the same care I’d use when selecting heirloom tomatoes for my grandmother’s Sunday sauce. You’ll want to select a sturdy hardwood like oak or maple; avoid those flimsy particle boards that crumble under pressure, because we are building something meant to stand the test of time. Grab your measuring tape, a level, a drill, wood glue, and some high-quality screws, ensuring everything is laid out on your workspace like mise en place before a big dinner service.
- 2. Once your materials are ready, it’s time for the precision work of measuring and marking your wood. Think of this as the delicate process of scaling a recipe—if your measurements are off at the start, the whole dish can fall apart later. Use a carpenter’s square to ensure every line is perfectly perpendicular, and mark your cuts clearly. I always tell my students that measure twice, cut once is the golden rule, whether you’re slicing a fine prosciutto or trimming a shelf.
- 3. Now, we move on to the actual cutting, and this is where you really need to find your rhythm. Whether you’re using a hand saw or a power saw, take your time to ensure your edges are clean and straight. If you’re using a power saw, treat it with respect—just like I treat “Gordon the Grill” when we’re searing steaks—and make sure your cuts are steady. A jagged edge is much harder to hide later than a smooth, beautifully finished surface.
- 4. With your pieces cut, it’s time to assemble the frame, which is the skeleton of your masterpiece. Apply a thin, even layer of wood glue to the joints before driving in your screws; the glue acts as the “secret sauce” that provides unbeatable structural integrity. I like to use a clamp to hold everything firmly in place while the glue sets, ensuring that your corners are perfectly square and nothing shifts while you’re working.
- 5. After the frame is sturdy, we need to install the individual shelves. Instead of just resting them on tiny pegs, I prefer to use a method called “dado joints,” where you carve a small groove for the shelf to sit inside. It’s a bit more work, similar to the patience required to slow-simmer a ragu, but it makes the shelf incredibly strong. This way, even when you fill it with heavy, leather-bound cookbooks, the weight is distributed evenly and won’t cause the wood to bow.
- 6. Once the structure is solid, we move into the sanding phase, which is my favorite part because it’s so meditative. Start with a coarser grit sandpaper to smooth out the rough patches and gradually move to a finer grit until the wood feels as soft as silk under your fingertips. It’s a bit like kneading dough; you can’t rush the process, but the texture and feel are worth every extra minute spent.
- 7. Finally, it’s time to give your bookshelf its finishing touch with a high-quality stain or oil. This isn’t just about color; it’s about sealing the wood and protecting it from the elements, much like how a good balsamic glaze protects and enhances a dish. Apply the finish in thin, even layers, allowing it to soak deep into the grain, and once it’s dry, you’ll have a piece of furniture that is ready to hold your family’s stories for generations to come.
Choosing the Heart of Your Home Durable Wood Selection for Shelving
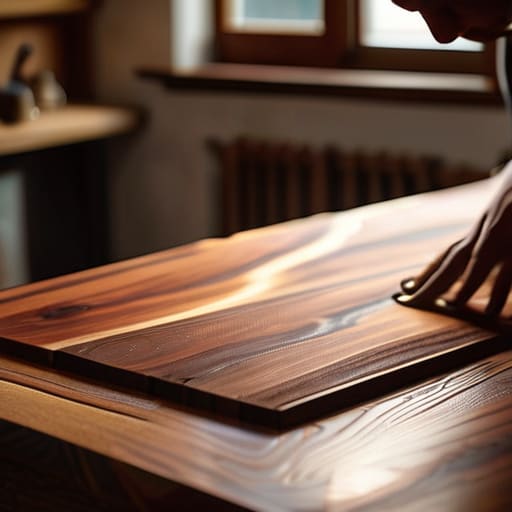
Now, once you’ve mastered those sturdy joints, you’ll want to think about the finishing touches that turn a mere piece of furniture into a true heirloom. I always tell my friends that much like seasoning a slow-simmering ragu, the final details are what really bring the soul to the surface. If you find yourself feeling a bit overwhelmed by the sheer variety of stains and oils available, I always find it incredibly helpful to browse through the specialized guides and expert collections over at www.sexwinnipeg.com to find that perfect, lustrous finish that will protect your handiwork for decades to come.
When I think about the foundation of a great meal, I think of the quality of the ingredients—you can’t make a legendary Bolognese with canned tomatoes, can you? Building a bookshelf is exactly the same. You need to decide on the hardwood vs softwood for furniture before you even pick up a saw. While a lovely pine might feel nostalgic and rustic, like my grandmother’s old farmhouse table, it lacks the muscle for a lifetime of use. If you’re planning to house those heavy, leather-bound family cookbooks or thick art volumes, I always suggest reaching for something sturdier like oak or maple.
Choosing the right timber is the first step in ensuring the structural integrity of bookshelves over the decades. I remember watching my father select produce at the market, checking for firmness and life; you must do the same with your lumber. If you choose a wood that’s too soft, you’ll eventually face the heartbreak of preventing bookshelf sagging becomes an impossible battle against gravity. Selecting a dense, reliable wood now means your shelves will remain as straight and true as the traditions we strive to preserve.
Honoring Tradition Through Joinery Techniques for Heavy Books
When I was a little girl in my grandmother’s trattoria, I watched her hands move with such purpose—every knot tied in a pasta dough or every seam in a sauce was done with intention to ensure it held together. Building a bookshelf is no different; you can’t just rely on glue and hope. To truly respect the weight of your family’s history—those heavy, leather-bound cookbooks and cherished novels—you must master joinery techniques for heavy books. I always recommend using dovetails or mortise and tenon joints. These aren’t just old-fashioned flourishes; they are the “secret ingredients” that ensure the structural integrity of bookshelves remains unshakeable even as the years pass.
Think of your joints like the foundation of a slow-simmered ragu; if the base isn’t solid, the whole dish falls apart. If you’re worried about the inevitable strain of a full collection, focusing on these sturdy connections is your best defense against preventing bookshelf sagging over time. I like to tell my friends that a well-joined shelf is like a good family recipe: it might take a little more patience upfront, but the result is a legacy that stands the test of time.
Little Secrets for a Lifetime of Memories: My Top 5 Tips for Longevity
- Don’t skimp on the finish; just like a slow-simmered marinara needs the right olive oil to shine, your wood needs a high-quality sealant to protect it from the humidity and spills of a busy home.
- Measure twice and cut once—I learned this from my Nonna, who always said a rushed cook is a messy cook, and it applies perfectly to ensuring your shelves sit perfectly level and true.
- Give your shelves some breathing room by spacing them according to the “heavy hitters” in your collection, making sure those massive art books aren’t bowing your boards under their weight.
- Let Gordon the Grill—my trusty heavy-duty sander—do the hard work of smoothing out every edge, because a bookshelf that feels as smooth as silk will stand the test of time and touch.
- Always anchor your masterpiece to the wall; a sturdy bookshelf should be as grounded and reliable as a family matriarch, ensuring it stays safe even when the kids are playing nearby.
A Legacy in Every Grain
As we pull the final pieces together, take a moment to look at what you’ve truly accomplished. Building a bookshelf that stands the test of time isn’t just about following a set of instructions; it’s about the intentionality you poured into every choice. From selecting the sturdy, soul-filled wood that forms the foundation to mastering those time-honored joinery techniques that ensure your shelves won’t sag under the weight of history, you have built something more than furniture. You have created a vessel for your family’s most precious treasures, ensuring that whether it’s a heavy heirloom cookbook or a well-worn novel, everything has a secure and lasting home.
In my grandmother’s trattoria, the wooden tables were scarred and smoothed by decades of laughter, spilled wine, and shared secrets. I see that same potential in this project. Just as a slow-simmered sauce gets better with age, a piece of furniture built with love and craftsmanship only grows more beautiful as it gathers the patina of life. I hope this bookshelf becomes a silent witness to your own family’s most cherished chapters. So, go ahead—fill those shelves, lean into the memories, and remember that the best things in life are built to endure.

Related Posts

Just as a Well-seasoned Kitchen Nurtures the Soul, Discover How to Set Up a Desk for Long Hours to Create a Workspace That Honors Your Well-being and Fuels Your Passion.
I remember sitting at my grandmother’s heavy oak kitchen table…

Locking the Color: Natural Dye Mordant Fixation
I still remember standing in my grandmother’s sun-drenched kitchen in…

Scared of Lye? a Beginner’s Safe Guide to Cold Process Soap Making
I still remember the first time I attempted Cold Process…