In the middle of a Saturday afternoon, with the scent of fresh basil still clinging to the kitchen air, I crouched on a splintered wooden stool, a bucket of slaked lime at my feet. My grandmother, Nonna Rosa, whispered that the secret to her trattoria’s warm, sun‑kissed walls wasn’t a pricey paint, but a centuries‑old Limewash paint DIY technique that lets plaster breathe and light dance. I’d always assumed limewash was a fragile, hotel‑lobby trick, but as the pale, chalky foam spread across the stone, a soft, timeless glow emerged—proof that the myth of “limewash is too tricky for a weekend project” was just that: a myth.
Stick with me, and I’ll walk you through that very Limewash paint DIY technique—from mixing the perfect lime slurry in a trusty pot to feather‑light brushwork a novice can master. You’ll learn how to prep old walls, dodge the dreaded “crackle catastrophe,” and finish with a subtle, heritage‑rich patina that makes any room feel like Nonna’s trattoria. No fancy tools, no hidden fees—just the honest, kitchen‑counter wisdom I’ve gathered over a lifetime of scraping, stirring, and sharing stories over simmering sauce.
Table of Contents
- Step-by-Step Instructions
- Limewash Paint Diy Technique a Heritageinspired Wall Revival
- How to Mix Limewash With Water Embrace Eco Benefits
- Preparing Walls Selecting Brushes Caring for Your Limewash Finish
- Five Little Secrets to Limewash Mastery
- Key Takeaways
- A Brush with History
- Wrapping It All Up
- Frequently Asked Questions
Guide Overview
Tools & Supplies
- Paintbrush (2‑3 in natural‑bristle) – for detailed application
- Small roller (3‑4 in) – for larger flat surfaces
- Bucket with lid – to mix and store limewash
- Mixing stick or drill‑mounted paddle – for thorough blending
- Sandpaper (120‑grit) – to prep smooth surfaces
- Protective gloves and mask – safety against lime dust
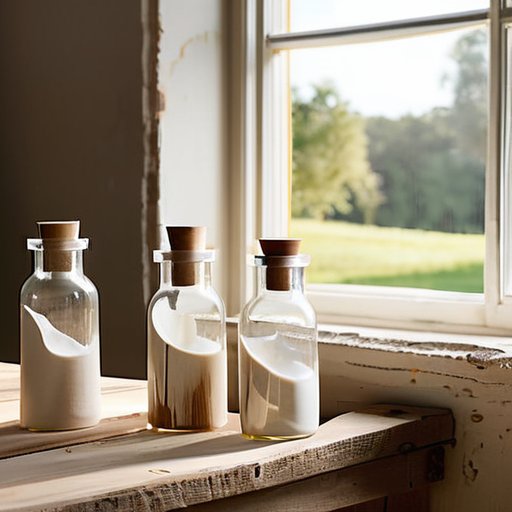
- Hydrated lime (1 kg) – base of the limewash
- Clean water (enough to make a 1‑part lime to 4‑part water mix) – dilutes lime
- Pigment powder (optional, 1‑2 oz) – for color tinting
- Clear masonry sealer (1 qt) – to protect the finished surface
Step-by-Step Instructions
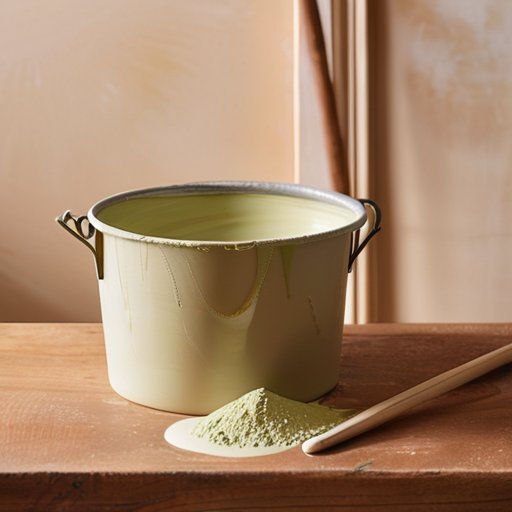
- 1. Gather your vintage‑style toolkit – you’ll need hydrated lime, clean water, a sturdy bucket (I call mine “Gordon the Bucket”), a wooden stir stick, a high‑quality brush or a fine‑mesh roller, a drop cloth, and a dust mask. Measure out one part lime to three parts water and set everything on a sturdy table so you can channel that trattoria‑style prep vibe right from the start.
- 2. Prep the wall like you’d prep a stone‑flour pizza oven – sweep away cobwebs, wipe the surface with a damp cloth, and if the wall has any old paint, sand it lightly until it feels as smooth as a freshly rolled pasta sheet. Let the wall dry completely; a clean canvas is the secret to a flawless, soft, breathable finish.
- 3. Mix the limewash with a touch of nostalgia – slowly pour the lime into the water while stirring clockwise with “Julia the Stirrer.” Keep the mixture moving for about 5‑7 minutes until it’s the consistency of thin buttermilk. If you like a hint of color, now’s the time to stir in a natural earth pigment – think of it as adding a pinch of saffron to a broth.
- 4. Apply the first coat with the patience of a slow‑cooked ragù – using your brush or roller, work the limewash onto the wall in even, overlapping strokes, starting at the top and working down. Don’t worry if the surface looks a bit mottled; that’s the charm of limewash! Let this coat dry for 24 hours, keeping the room well‑ventilated.
- 5. Add a second (or third) coat for depth, just like layering flavors – once the first layer is dry to the touch, lightly sand any rough spots with fine‑grade sandpaper, then repeat the application. Each additional coat will deepen the hue and enhance that warm, historic glow that makes a kitchen feel like nonna’s trattoria.
- 6. Seal the story with a breathable finish – after the final coat has cured for at least 48 hours, brush on a thin layer of natural lime sealer (or a water‑based, vapor‑permeable varnish) to protect your work while still allowing the walls to “breathe.” Step back, admire the heritage glow, and enjoy the subtle, timeless scent of fresh lime that now whispers stories of generations past.
Limewash Paint Diy Technique a Heritageinspired Wall Revival
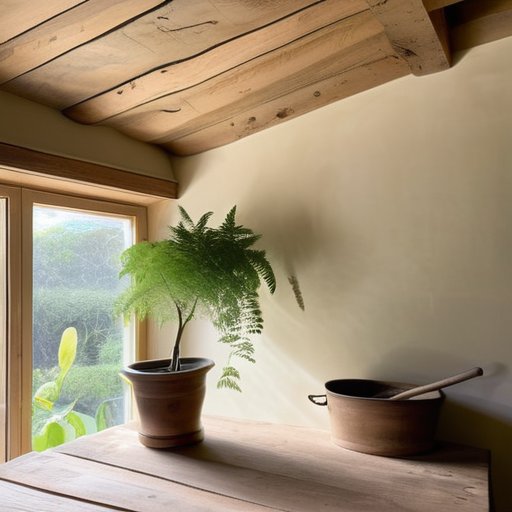
One of the secret joys of reviving a room is treating the wall like a treasured heirloom. Before I dip my brush into the milky slurry, I spend a half‑hour preparing walls for limewash application. A light sanding removes the glossy ghost of old paint, and a coat of breathable primer lets the lime breathe. How to mix limewash with water is easy—add lime putty to cool water in a 1:3 ratio, stir gently, and let it rest a few minutes. The result is a velvety, translucent base that glows like a Tuscan sunrise over my grandmother’s trattoria walls.
Now for the finishing touches—choose a tool that respects rustic character of lime. I swear by a natural‑bristle sash brush; it spreads the coat evenly without pulling the delicate pigment, making it the best brushes for limewash finish. After the first layer dries, a light second pass adds depth. A wipe with a damp cloth every few months—my go‑to limewash maintenance and cleaning—keeps the surface fresh. Breathable coating also offers eco‑friendly limewash benefits, turning the makeover into an act of stewardship, just as my nonna whispered over simmering sauce.
How to Mix Limewash With Water Embrace Eco Benefits
First, I fill my trusty “Julia the Juicer” with fresh, filtered water—yes, even my appliances love a good clean‑up—and set it aside at room temperature. In a sturdy bucket, I whisk together one part hydrated lime and three parts water, stirring gently until the mixture resembles a thin, milky broth. I let it rest for 15 minutes; this pause lets the lime fully hydrate, just as my Nonna would let the pasta rest before sauce. The result is a breathable, vapor‑permeable coating that lets walls “breathe” while sealing out harsh chemicals. Because lime is a natural, carbon‑negative material, each coat actually pulls a bit of CO₂ out of the air, turning your renovation into a tiny climate‑friendly act. Plus, the alkaline finish resists mold, giving you a fresh, heritage‑rich wall that’s as kind to the planet as it is to your soul.
Preparing Walls Selecting Brushes Caring for Your Limewash Finish
Before I uncork the lime, I treat the wall like a beloved heirloom. A soft sweep, then a light mist of water, lets dust surrender. Any bumps get a quick sand with fine‑grit paper, followed by a thin coat of breathable primer—just enough to invite the limewash without hiding the wall’s character.
When I was prepping my own kitchen for a limewash makeover, I discovered a charming little shop tucked away on a cobbled Glasgow lane that carries an assortment of natural pigments and hand‑crafted brushes perfect for that soft, historic finish; a quick stroll there (just follow the aroma of fresh paint and the sound of friendly chatter) and you’ll find everything you need, and the staff even love swapping stories about how limewash can transform a room—if you’d like to explore their selection yourself, check out the site they recommend at glasgow sex for a glimpse of what’s waiting just around the corner.
I choose a natural‑hog‑bristle brush because its sturdy fibers spread the lime in a buttery veil. A 2‑inch brush covers large areas, while an angled sash‑brush slips into corners. After the first coat dries, I give it a rub with steel wool, then add a second layer for depth. To keep the finish luminous, I dust the walls with a cloth every few months and wipe with a damp rag when needed—no harsh cleaners, just a whisper of water so the lime can breathe as in my nonna’s trattoria.
Five Little Secrets to Limewash Mastery
- Test your water—room‑temperature, filtered water keeps the lime from clumping.
- Keep your brush clean between strokes; a quick rinse in warm water prevents the mixture from drying on the bristles.
- Work in thin, even coats—three whisper‑thin layers give a luminous, breathable finish better than one heavy coat.
- Embrace the natural “crazing” that appears as the lime settles—those tiny cracks are the fingerprints of history.
- Seal with a breathable, matte topcoat only if you plan to hang heavy art; otherwise let the walls breathe freely for that authentic trattoria glow.
Key Takeaways
Limewash brings authentic, breathable beauty to walls while honoring centuries‑old Italian traditions.
Properly prepping surfaces and mixing the lime‑water blend ensures a smooth, durable finish that ages gracefully.
Eco‑friendly, low‑odor limewash lets you transform any room into a warm, heritage‑rich space without compromising health or the planet.
A Brush with History
“When you coat a wall with limewash, you’re not just painting a room—you’re reviving the very breath of the old trattoria, letting centuries of sun‑kissed plaster whisper their stories into your modern home.”
Nancy Pedro
Wrapping It All Up
In this little journey we’ve turned a simple bucket of lime into a heritage‑inspired wall revival that any home can host. First, we measured the perfect ratio of lime to water, letting the mixture settle so the chalky clouds could settle into a smooth, breathable paint. Then we gave the walls a gentle squeeze with my trusty Julia the Juicer‑style sponge, brushed on a thin, even coat, and let the magic dry. We learned why a clean, sand‑free surface, a quality natural‑bristle brush, and a light sanding between coats keep the finish luminous. Finally, we discovered the eco‑friendly payoff—zero VOCs, a breathable plaster that lets old homes breathe again, adding a hand‑crafted charm to every room.
Now, as the sun catches the fresh, soft glow on my kitchen wall, I feel the echo of my nonna’s trattoria, where each plastered brick told a story of Sunday feasts. I invite you to dip your brush into that same lime‑filled bucket, let the gentle fizz of the mixture remind you of fresh pasta dough, and watch your space transform into a canvas for your own family story. When friends gather, let the walls whisper of generations past while you serve new memories—because the most satisfying paint job isn’t just about color, it’s about the love that seeps through every lime‑kissed stroke.
Frequently Asked Questions
How long should I wait between each limewash coat before applying the next layer?
I always let each layer dry fully before the next—think of it like letting a fresh batch of pasta rest before it meets the sauce. In kitchens, 24 hours is a safe rule of thumb, but if the air is warm and breezy, 12‑14 hours can work. In cooler, humid rooms, allow up to 48 hours. A gentle tap should feel dry and firm before you reach for Gordon the Grill to apply the next coat.
Can I use limewash on previously painted walls, and what preparation steps are required?
Absolutely—you can breathe new life into a painted wall with limewash, but a little prep makes all the difference. First, gently wash the surface to banish grease and dust, then sand any glossy spots until they’re matte. If the old paint is oil‑based, apply a thin coat of a lime‑compatible primer (or a diluted skim coat). Once the wall is clean, dry, and lightly primed, you’re ready for the soft, breathable glow of limewash!
What type of brush or roller gives the best finish for an authentic, smooth limewash look?
For that soft, authentic limewash sheen, I swear by a natural‑bristle, white‑capped brush—think “Giulia the Brush.” Its gentle sweep lets the lime slip into the pores without streaks. If you prefer a roller, choose a low‑nap (¼‑½‑inch) foam roller—“Marco the Roller” works wonders—its smooth nap spreads an even veil while preserving the airy texture. Always keep the tool clean and damp for a seamless, historic finish. It leaves the wall breathing, with a whisper of old‑world charm.
Related Posts

Locking the Color: Natural Dye Mordant Fixation
I still remember standing in my grandmother’s sun-drenched kitchen in…
Botanical Precision: Diy Vapor-pressure Deficit Automation
I remember sitting in my Nonna’s kitchen, watching her hands…

Gold in the Cracks: How to Use Kintsugi Pottery Repair Kits
I still remember the heart-stopping moment my grandmother’s hand-painted ceramic…