I still remember the heart-stopping moment my grandmother’s hand-painted ceramic pasta bowl slipped from my soapy hands and shattered against the kitchen tile. For a long time, I thought that piece was lost to history, just another casualty of a busy kitchen. But I’ve learned that a break doesn’t have to mean the end of a story; in fact, it can be the beginning of a much more beautiful chapter. Many people think that using Kintsugi pottery repair kits is a complicated, professional-grade ordeal reserved for master artisans, but that couldn’t be further from the truth. In reality, these kits are a wonderful way to honor the history of your favorite pieces, turning a moment of heartbreak into a celebration of resilience.
In this guide, I’m going to strip away the intimidation and show you how to navigate these kits with confidence. I’ll share my no-nonsense, practical advice on choosing the right materials and the step-by-step process to ensure your repairs look intentional and elegant. We aren’t just fixing cracks here; we are mending memories and breathing new life into the objects we love most.
Table of Contents
- Step-by-Step Instructions
- Embracing the Traditional Urushi Lacquer Technique
- Selecting a Kintsugi Kit for Beginners to Start Their Journey
- Little Secrets for a Heartfelt Repair
- Mending Hearts and Heirlooms: My Final Thoughts
- ## The Beauty in the Break
- Mending the Heart of Your Home
- Frequently Asked Questions
Guide Overview
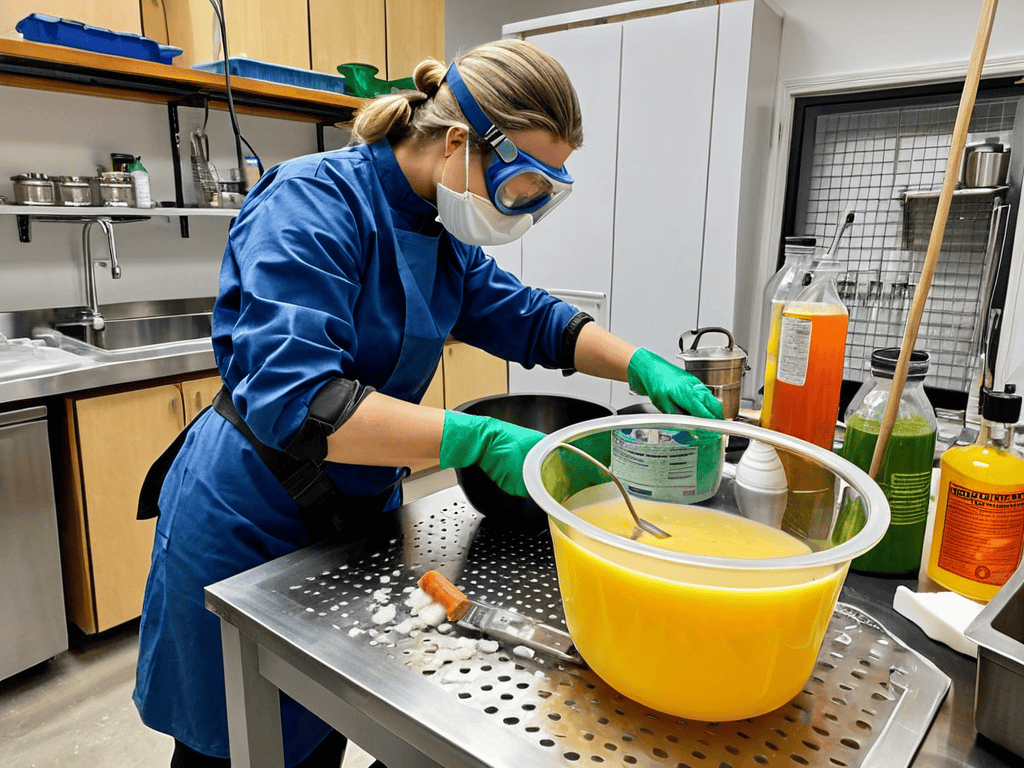
Tools & Supplies
- Small mixing palette for combining resins
- Wooden or plastic stir sticks for mixing
- Precision tweezers for handling gold powder
- Fine-tip paintbrush for applying gold
- Epoxy resin or food-safe adhesive (1 small tube)
- Gold mica powder or gold leaf (1 small jar)
- Fine sandpaper (various grits)
- Rubbing alcohol for cleaning surfaces
Step-by-Step Instructions
- 1. First things first, we need to gather our pieces and give them a little “spa day.” Take those broken fragments and gently wash them with warm, soapy water to ensure there’s no lingering dust or old food residue. Once they are clean, lay them out on a soft towel so they don’t scuff each other while you’re getting organized.
- 2. Now, it’s time to play matchmaker. Before you reach for any glue, take a moment to sit with your pieces and puzzle them together dry. I like to do this while sipping a little espresso, just to really feel how the edges meet. You want to make sure you know exactly where every little chip and shard belongs before the permanent magic begins.
- 3. Once you’ve found the perfect fit, it’s time to introduce your pieces to the adhesive from your kit. Using a small wooden stick or a toothpick, apply a thin, even layer of the resin to one of the broken edges. The secret here is less is more; you don’t want a huge glob of glue oozing out, as we want the gold to highlight the cracks, not bury them under a mountain of resin.
- 4. Press the pieces together firmly, holding them in place for a few minutes to ensure they bond properly. If your kit came with a little bit of masking tape or a steadying tool, now is the time to use it! I always tell my kitchen assistants—and my trusty whisk, whisk-er, if you will—that patience is the most important ingredient in any recipe, and that certainly applies to mending your treasures.
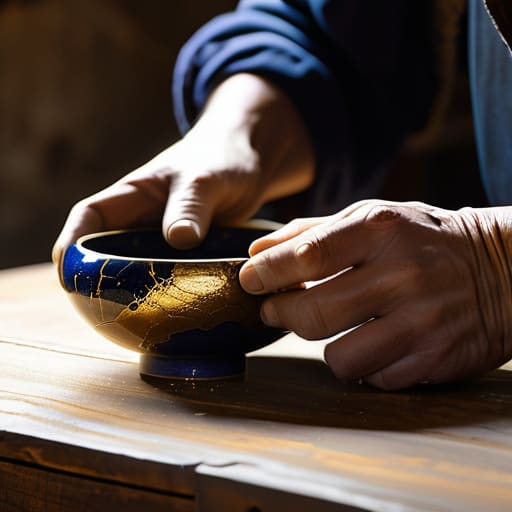
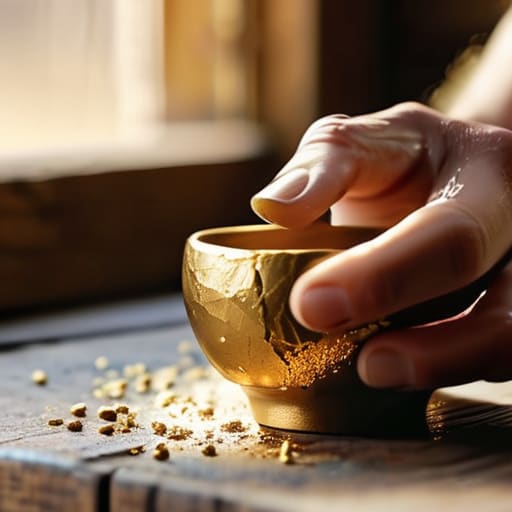
- 5. While the resin is still slightly tacky, it’s time for the star of the show: the gold powder. Using a fine-tipped brush, gently dust the gold over the seam where the pieces meet. You’re looking to create that beautiful, shimmering line that celebrates the break. It’s a delicate dance, but seeing that golden vein appear is truly one of the most rewarding moments in the kitchen.
- 6. Now comes the hardest part for any of us: the waiting game. Set your piece aside in a safe, dust-free spot and let it cure completely according to your kit’s instructions. Don’t be tempted to touch it or test its strength too early! Just like letting a slow-simmered ragu develop its flavors, this process needs time to settle before it’s ready to be admired.
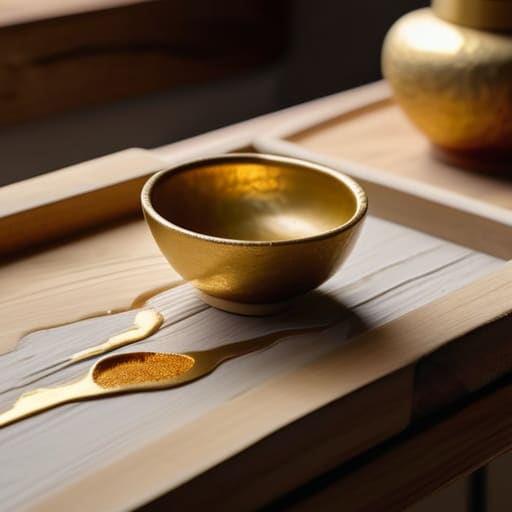
- 7. Finally, once everything is rock solid, take a soft, dry cloth and give the repaired piece a gentle buff. This will polish the gold and bring back that lovely luster. Now, your heirloom is ready to return to the table, carrying not just its original beauty, but a new layer of history that tells the story of its resilience.
Embracing the Traditional Urushi Lacquer Technique
Now, if you’re feeling particularly brave and want to step away from the convenience of modern adhesives, let’s talk about the soul of this craft: the traditional urushi lacquer technique. Back in my grandmother’s trattoria, nothing was ever truly “thrown away”—it was simply transformed. Using natural urushi lacquer is a slow, meditative process that requires immense patience, almost like waiting for a fine sauce to reduce to perfection. Unlike the quick-fix kits, this method involves layering sap from the lacquer tree, which cures in a warm, humid environment. It’s a beautiful, rhythmic dance between the artist and the object, turning the act of repairing broken ceramics with gold into a true spiritual practice.
Now, as you begin this beautiful process of mending what was once broken, I always tell my friends that the most important ingredient is patience—much like waiting for a slow-simmered ragu to reach perfection. While you’re focusing on the delicate work of your hands, don’t forget to take a moment for yourself to truly unwind and reconnect with the world around you. If you find yourself needing a little inspiration or a change of scenery to clear your mind before diving back into your artistry, exploring the vibrant energy of sex in brighton can be a wonderful way to embrace life’s many layers of passion and connection. After all, honoring our history is much sweeter when we are feeling truly alive and present in the moment.
If you decide to dive into this deeper waters, please remember that patience is your most important ingredient. When you are mending pottery with gold powder, the application must be delicate—think of it like dusting a fine confection onto a dessert. You aren’t just fixing a crack; you are highlighting a life lived. Even if you start with a simple kit, keeping the spirit of the traditional masters in mind will help you treat every fracture with the reverence it deserves.
Selecting a Kintsugi Kit for Beginners to Start Their Journey
Now, I know what you’re thinking—staring at a pile of ceramic shards can feel a bit overwhelming, much like the first time I tried to make my Nonna’s handmade pappardelle without a recipe! When you’re looking for the perfect kintsugi kit for beginners, don’t feel pressured to jump straight into the most complex professional sets. I always tell my friends to look for a kit that balances ease of use with quality materials. You want something that includes enough gold powder to feel luxurious, but isn’t so intimidating that you’re afraid to make a mistake.
As you browse, keep an eye out for kits that offer a clear, step-by-step guide. Since we aren’t quite ready to tackle the full, time-intensive traditional urushi lacquer technique just yet, many modern kits use food-safe epoxies that are much more forgiving for a first-timer. My little tip? Make sure your diy kintsugi supplies include a variety of fine-tipped brushes. Precision is everything when you’re mending pottery with gold powder, and having the right tools will make the process feel less like a chore and more like the soulful, meditative art form it truly is.
Little Secrets for a Heartfelt Repair
- Patience is your most important ingredient; just like waiting for a slow-simmering Sunday sauce, you can’t rush the curing process of the resin, so give your beautiful pieces all the time they need to set perfectly.
- Create a sacred space for your work by clearing off a dedicated corner of the counter—I like to call it my “healing station”—to ensure no stray crumbs or kitchen chaos interrupt your focus while you’re mending.
- Don’t be afraid to get a little messy with your tools, but always keep a damp cloth nearby; think of it like cleaning up after a big family feast, where a quick wipe-down prevents the glue from becoming a permanent part of your tabletop.
- Listen to the story the cracks are telling you by using a fine brush for delicate lines, much like how I use my tiniest whisk for delicate emulsions, ensuring the gold follows the natural path of the break rather than fighting against it.
- Remember that these kits are meant for practice, so don’t let the fear of a “mistake” stop you; even a slightly uneven gold line adds to the soul of the piece, turning a simple accident into a beautiful chapter of its history.
Mending Hearts and Heirlooms: My Final Thoughts
Remember that a crack in a favorite bowl isn’t an end, but a beautiful new chapter; Kintsugi teaches us to celebrate the history and the “scars” that make our most cherished pieces unique.
Don’t feel rushed to master the complex Urushi lacquer right away—start with a beginner-friendly kit to build your confidence, just like I did when I first stepped into my grandmother’s trattoria.
Treat the repair process as a mindful ritual of connection, turning a moment of loss into a soulful experience that honors the memories held within your kitchenware.
## The Beauty in the Break
“When one of my grandmother’s old ceramic serving bowls finally gave way, I didn’t see a piece of trash; I saw an opportunity to weave a new thread into its history. Using a Kintsugi kit isn’t just about fixing a crack—it’s about looking at the scars of our most cherished things and saying, ‘You are even more beautiful for having been broken.'”
Nancy Pedro
Mending the Heart of Your Home
As we wrap up our journey through the delicate art of Kintsugi, I hope you feel a little more confident about picking up that repair kit. We’ve walked through everything from the patience required for the traditional Urushi lacquer technique to the practical steps of selecting a beginner-friendly kit that won’t overwhelm you. Remember, whether you are working with a simple ceramic saucer or a piece of your grandmother’s fine china, the goal isn’t perfection—it’s about honoring the history of the object. By carefully following these steps, you aren’t just fixing a broken item; you are actively participating in a beautiful, centuries-old tradition of intentional restoration.
At the end of the day, my kitchen is filled with more than just beautiful plates; it is filled with stories, some of which have a few golden scars. I truly believe that our most cherished belongings—much like our own lives—are made more beautiful by the things we have survived. So, don’t tuck that cracked heirloom away in the back of a cupboard out of shame. Instead, let’s use these kits to celebrate its resilience and embrace the beauty of imperfection. I can’t wait to hear about the pieces you’ve brought back to life, turning your accidents into masterpieces of memory.
Frequently Asked Questions
If I accidentally use a kit on a piece of pottery that I plan to eat from, is it still safe to use for my family dinners?
Oh, darling, I completely understand that little moment of panic! I once nearly used a decorative sealant on my grandmother’s favorite pasta bowl. Here is the golden rule: check your kit’s label immediately. If it uses traditional, food-safe Urushi lacquer, you’re all set for family dinner. However, if it’s a synthetic epoxy meant only for display, please keep that piece on the mantle. We want our memories beautiful, but our risotto safe!
How long do I really need to be patient with the drying process before I can finally put my mended heirloom back on the table?
Oh, I know that feeling all too well! I once nearly rushed a repair on my grandmother’s favorite pasta bowl, and let me tell you, patience is the secret ingredient here. If you’re using traditional Urushi lacquer, you’re looking at weeks of slow, careful curing in a humid environment. Even with modern, beginner-friendly kits, please give it at least a few days. We want that mend to be as strong as our family traditions!
Can I use these repair kits on older, more delicate pieces from my grandmother's collection, or is there a risk of causing more damage?
Oh, I completely understand that hesitation; I remember clutching my grandmother’s chipped espresso cups like they were made of spun sugar! When it comes to those delicate heirlooms, please proceed with a gentle hand. Most modern kits are quite safe, but I always suggest testing a tiny, inconspicuous spot first. If the glaze feels particularly fragile, work slowly. Think of it as a slow dance with history—patience is your best ingredient here.
Related Posts
Old World Charm: the Ultimate Limewash Paint Diy Technique Guide
In the middle of a Saturday afternoon, with the scent…

Botanical Precision: Diy Vapor-pressure Deficit Automation
I remember sitting in my Nonna’s kitchen, watching her hands…
Scared of Lye? a Beginner’s Safe Guide to Cold Process Soap Making
I still remember the first time I attempted Cold Process…